Soldering Guide Basics
Before you do any kind of soldering, you should read the Soldering Guide: Safety Tips. You need to familiarise yourself with the materials that you are handling. You need to know how they behave, how to handle them, moreover, what to do if something goes wrong. I had a great teacher -- Robert -- who spent a whole class session going over the safety requirements, which is one of those things that all responsible professionals do.
Safety Prerequisites
When using lead-based solders, use rubber gloves for handling them. Children sometimes forget to wash their hands, so remind them. Suddenly the recess bell rings and they all run outside forgetting that they need to wash their hands.
If your school building does not have an LEV System to extract the solder fumes, then you will have to use a solder that is rosin free, because many students may be asthmatics and the rosin acid fumes will cause them to become wheezy. Then, they would have to use their salbutamol inhalers such as Ventolin to relieve the asthma attack.
Students should also use goggles similar to that used in Chemistry class because solder can spit and the hot smoke can get into their eyes. It is very unpleasant. When they are just starting out learning to solder they will not know how solder behaves with heat therefore these precautions are necessary.
A Good Workman
A good worker always has clean tools, therefore be sure to clean the tip before you start soldering. Once the soldering iron is hot, you should give the bit a little clean with the wet sponge, and coat the tip with some solder. Coating (tinning) something with solder also ensures a clean surface. Once the bit has some solder on it, wipe it off on the sponge to reveal a shiny surface. If you have a new soldering iron, you will have to repeat the process several times until you can see the tip coated with shiny solder.
Cleaning the Surfaces
If you are a student, then you will not have any expensive cleaning solutions at your disposal. Fine sandpaper is useful for cleaning the leads. Always clean the copper pads on the PCB; otherwise, you can end applying excessive heat, which will detach the pads.
Of course, if you are in college, and they have provided the cleaning solutions, then by all means, use them. Use them generously!Occasionally, when I am working on antique computers for the museum, I might use original vintage components, where the terminals may have tarnished over the years whilst in storage. In this case, a light abrasive for cleaning is useful.
Prepare the component: Like This
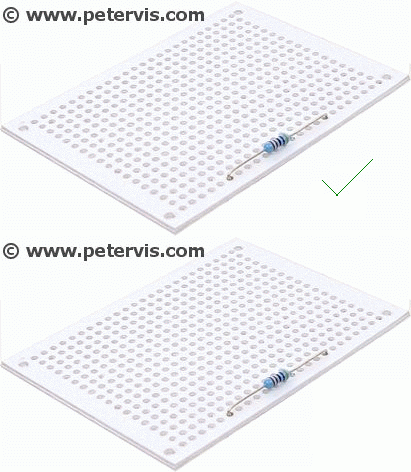
Bend your components terminals to the correct length. Use a nice pair of pliers to do that so it looks professional. Back in the 70s, an electronics magazine provided a free plastic tool for bending the component leads. I used this tool for many years because you could centre your resistors precisely and make perfect 90° bends to the terminals. Unfortunately, my friend Rufus borrowed it and now it is gone forever... Now I have to use a pair of pliers, which requires more effort and time.
Not Like This!
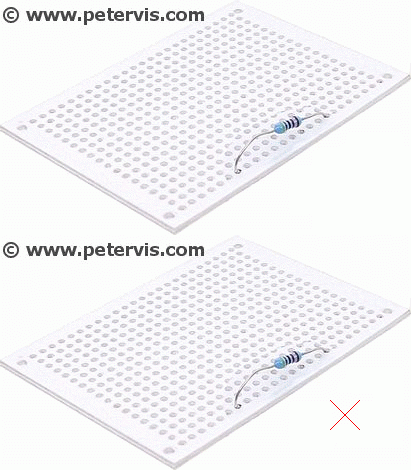
Do not use a messy approach like this. Electronics is a precise science. Straight lines and 90° angles are required. Your circuit will not only look neater, but will also be more reliable as a result.
Avoid Mr Blobby
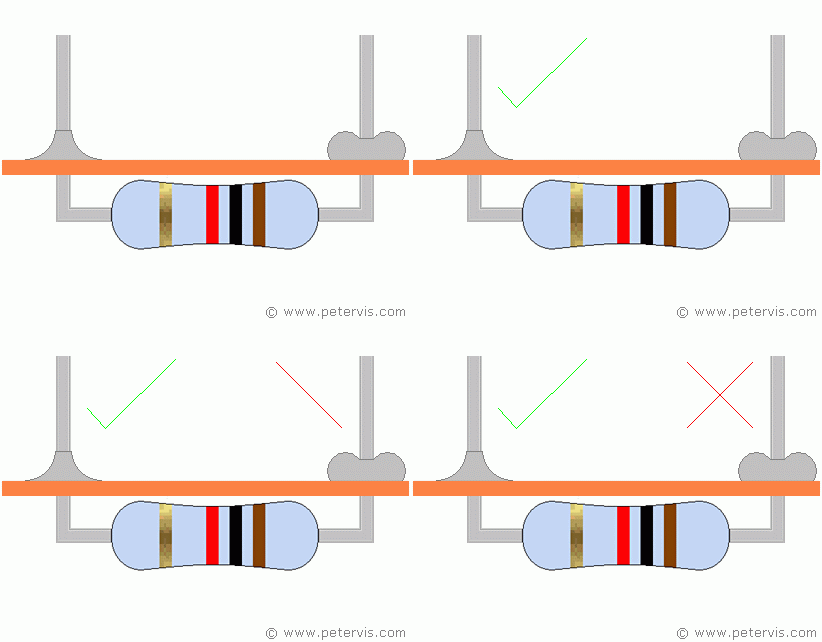
Here is an image my favourite digital electronics teacher drew on the board the first day. Amazing how things can stay with you. When soldering, you need to keep applying the solder until it covers the junction, and the pads. Apply just enough solder so that the solder forms a shiny concave shaped meniscus around the edges.
If you end up making a Mr Blobby, out of broken flaky solder, then you have done something wrong. A common mistake for beginners is to drip the solder onto the joint, instead of heating it and applying fresh solder to the heated surfaces. Another reason why this could happen is if the leads were not clean. Resistor leads often contain glue residue from the bandolier. You need to make sure your terminals are completely clean.
If you end up making a Mr Blobby, then just use the "Solder Sucker Tool" or a desoldering braid and remove the solder. Clean the iron tip, use fresh solder, and start again. This time heat the junction and apply the solder to the junction, not the soldering iron tip. Carefully let the joint cool down, do not move it whist it is cooling or else you might get a poor contact.
Cut the Leads before Soldering
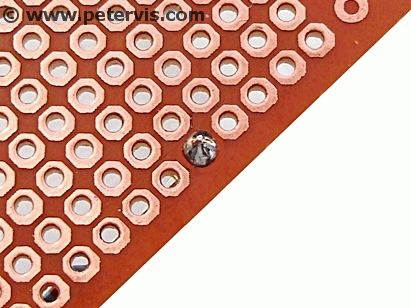
To cut or not to cut the leads before soldering is an area of debate for some professionals. I prefer to cut the leads before soldering, and leave them straight. I have a special pair of pliers that will cut the component lead to the exact same distance from the PCB every time. This makes all the solder spots the same height, which looks neater.
I once bought a cheap kit with a poor quality PCB, and whenever I cut the leads after soldering, the cutting force would detach the copper pad together with the solder... Hence cutting the leads before soldering helped. If you cut the leads before soldering, the component will fall out when you flip the board over, hence, I use a small strip of masking tape to temporarily secure it in place.
Bending the Leads by 45°
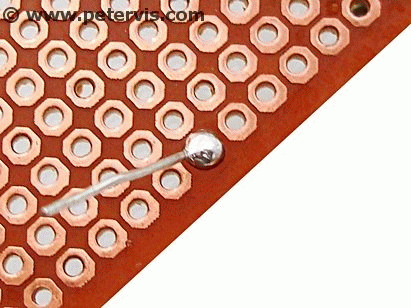
Many experts recommend bending the leads at 45° angles. This is a good method as well, but if for any reason you need to remove the component, it might be difficult if you have bent them too much. It can also make your soldering look messy with too much solder sitting on one side of the pad and too little on the other, and there is a larger risk of creating bridges.
Heat the Joint
A little solder on the tip helps to spread the heat more evenly to the joint and makes a better contact with the junction. Heat the junction of the copper pad and the component lead. If the pad has a tin HAL coating then you can apply heat to the pad and the component lead simultaneously. You should be aware that a pad without HAL might detach if you apply too much heat. Therefore, you need to apply the heat to the component lead.
Do not over-heat the joint or the component. Many components such as transistors and ICs are sensitive to heat and you should read the datasheet to help you determine how much heat they can withstand. For heat sensitive components, always fit a heatsink to the component, to draw the excess heat away.
Use Sharp Pliers for Cutting
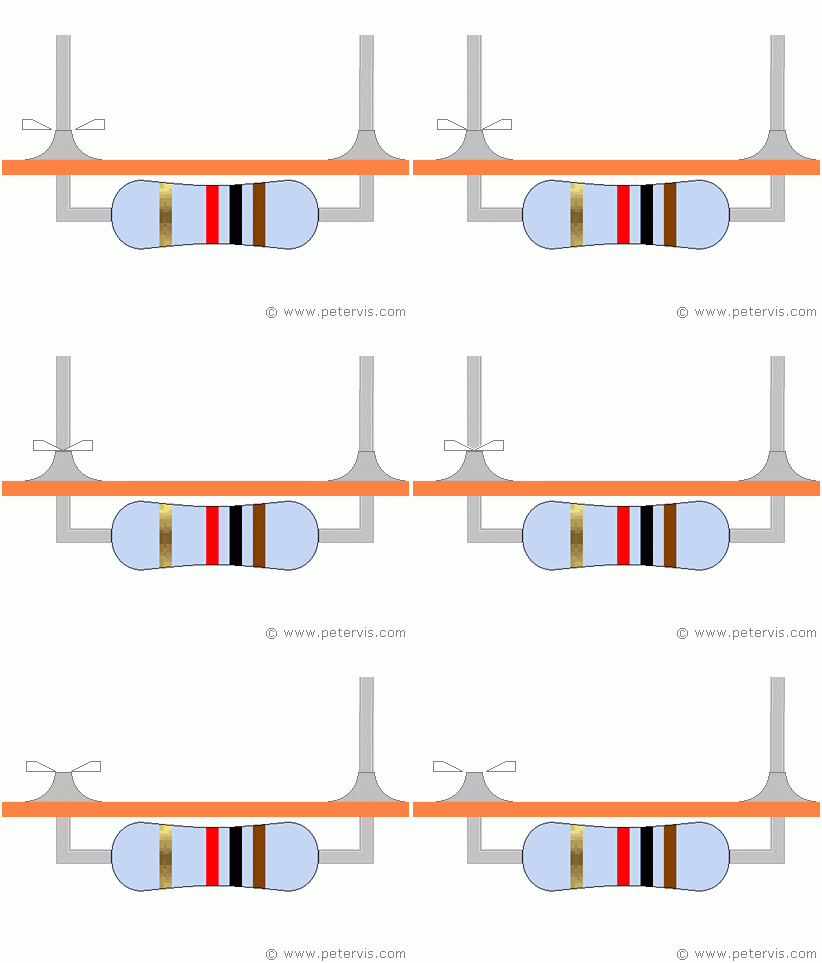
If you are cutting the leads after soldering, then use a nice sharp pair of pliers. I use pliers that are flat on one side and bevelled on the other so that I can get a flush cut. A flush cut will give you a flat surface, which not only looks nicer but works well too.
A sharp cutting edge on the pliers is vital to get a clean cut and to impart the least force on the soldered pad.
Troubleshooting
- When solder does not stick to the tip, use a tip cleaning solution. If you do not have a cleaner, then use a wet sponge to remove away the layer of oxide on the tip. Make sure you are using some flux wire as well. Just dry solder on its own will not help.
- If solder is not sticking to the wire, make sure that it is a copper or tin wire designed for soldering. Heat the wire surface sufficiently and apply the solder to the wire. Use plenty of flux to prevent oxidation.
- If solder is not sticking to the circuit board, then chances are there is an oxide layer on the copper preventing the solder from sticking. You will need to use a spray cleaner to clean the copper traces first to remove away the oxide.
- Good quality boards normally have a tin HAL layer on top of the copper traces to not only protect the copper from oxidation but also to make soldering easier. Unfortunately, cheap printed circuit boards will not have this tin HAL, and therefore you will be soldering directly onto the copper.
- A solder mask is normally coloured green or red, but now you can get clear masks as well. Make sure you are not trying to solder on top of the mask, as they repel the solder.
- Solder does not flow when it is not sufficiently heated. Solder will flow only when it is at the right temperature and plenty of flux present on the surface.
- Solder will not melt if the soldering iron tip is not the correct temperature. Check the datasheet of the solder to determine the correct melting point. This soldering temperature chart might help.
- Solder will ball up if it cannot spread on a surface. This is due to oxidation on the surface, insufficient heat on the surface, and insufficient flux.
- When solder does not stick to a metal, you need to figure out if the metal is the correct type. The easiest metals to solder are tin and copper. Aluminium is hard to near impossible because it forms an oxide layer very quickly.
- IPC soldering guide: For more information, the IPC website should be your first port of call for information regarding soldering best practices, including a soldering guide PDF and many resources.
This Article Continues...
A Soldering Guide for Beginners, Kids, and Electronics StudentsSoldering Guide: Safety Tips
Choosing the Right Solder Wire
How to Solder
Soldering Guide Basics
Soldering SMD Guide
Soldering in Space
How to Choose a Soldering Iron
Omega: Rosin and Lead Free Solder