CD Player Laser Assembly

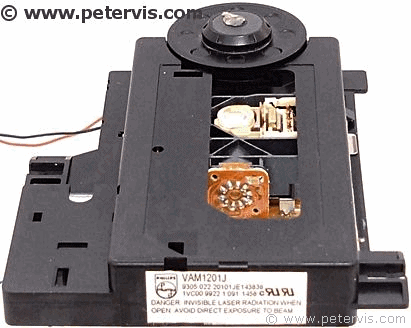
The VAM1201J is a CD player laser assembly (Optical Pickup) designed by the Philips Corporation, and manufactured in China.
When my Marantz CD player stopped reading discs, I knew that the laser had failed, as the faint glow of the laser beam -- which was usually visible from a distance in the dark -- was no longer present. Troubleshooting was not required, because I had cleaned the lens using a professional cleaner and that did not help. I was getting the dreaded "TOC READING" followed by "NO DISC" error for every disc I inserted.
The reflected laser beam detects the CD in the tray. If the laser is dead, then the built-in computer system simply tells you that there is no disc in the tray. It will not tell you that the laser has failed.
The direct replacement optical pickup is the Philips VAM 1202 for CDM 12.1. This two-speed pickup adheres to the red-book standard IEC908 where the disc orients horizontally. There are many sellers on eBay selling this. The cost of this mechanism ranges from around £10.00 to £25.00, however I am just a poor blogger, and I do not have twenty-five pounds to spare, so I chose the cheapest one. After a few days it arrived from China, and after installing it, the CD player worked!
VAM1202 Optical Pickup Compatibility


Marantz: CD17 MKII, CD14, CD1010, CD1020, CD38, CD43, CD46, CD48, CD53, CD57, CD57 MKII, CD63, CD63 MKII, CD63 MKII, CD63SE, CD67, CD67SE, CD72 CD5000, CD6000, CD6000 KI, CD6000 OS.
NAD: 510, 515
Technics: SL-P360, SL-P370, SL-P460, SL-P470, SL-P570, SL-PG480A, SL-PS670D, SL-PS770A
Philips: CD-723, CD-733, CD-740, CD-751, CD-753, CD-750

I would estimate the manufacturing cost of these units to be around three pounds, hence there is a nice wide profit margin for all the eBay sellers selling these. I would guess there are many die-hard CD users out there with high-end players that need the optical pickup replacing.
I took some photographs when I was repairing mine so that I could re-assemble it again properly. This article might help an engineer who is repairing their CD player.
Please note, looking into a laser beam is dangerous. Do not attempt any repairs if you are not a qualified and experienced engineer. There are many electronics shops and repair centres out there that can repair this for you.
If you want to know how to remove the CD transport deck and gain access to the laser assembly then the VAM1202 Replacement article has more information. In this article, I show how I changed the actual laser mechanism.
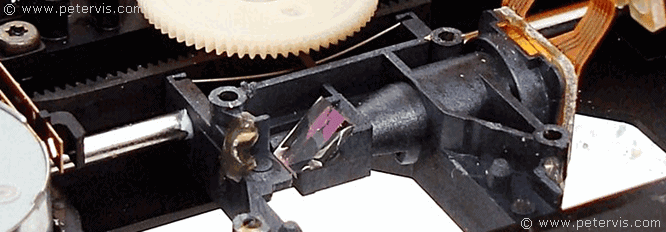
Since the original optical pickup was non-operational, I decided to take it apart to see what this so-called efficiency tube laser diode looks like. This little optical pickup seems to cause a lot of pain and suffering to so many music lovers. Never in the field of music has such a little thing caused so much suffering to so many people. :-)

The laser mechanism attaches to a platform with four translucent rubber suspension pillars, which require removal.

The rubber suspensions, slide out of the plastic slots as simply as this.

Here is the empty platform with the rubber suspensions.

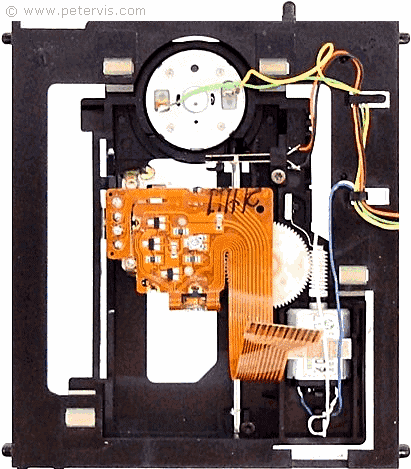
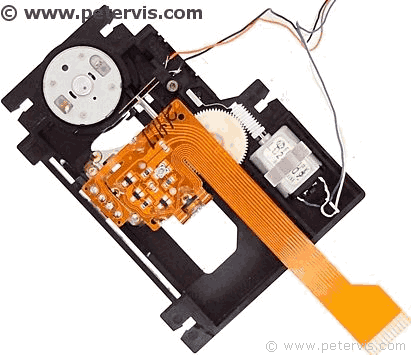
Here is a plan view of the Philips VAM assembly. It comes complete with the spindle motor and the clamping disc attached. On the underside, there is also the sled motor, and the lens focusing assembly. It all comes as a complete unit.

Here is another view of the assembly where you can see the pinout of the laser diode. The laser diode is an AIGaAs semiconductor construction with a wavelength of 780 nm.


I was surprised to find that the new optical pickup assembly did not arrive with all the wires soldered. Instead, you have to desolder the wires from the faulty unit and solder them to the new unit. The photographs in this article are useful as you can see where the wires are connected.
The blue and white pairs of wires are for the sled motor. The terminal with a red dot next to it is where the white wire connects.

You need to make sure that the wires for the two motors are connected correctly observing the positive and negative terminals of the motors and the colours of the wires. The motor wiring is very crucial, as incorrect wiring will mean that the motor will not rotate the correct way round.
The wires for the spindle motor are green and yellow pair. The spindle motor terminal with a red dot next to it is where the yellow wire connects.
The wires for the switch are the orange and black pair.
However, you must check your own mechanism in case there are any variations in colouring.
This Article Continues...
CD Player Laser AssemblyCD Player Laser Lens Assembly
CD Player Laser Diode Replacement
