All in One HDD Docking Station How to Use Instructions


You are not required to install a driver, unless your computer operating system is Windows 2000 or earlier.
Make sure you have installed a hard drive in the relevant slot, connected the power supply and USB cables, and then switch the unit ON. Usually, the computer automatically detects a mass storage device connected to the USB port and loads the necessary drivers.
There is an accompanying CD with software, which is required only if you wish to use the one touch backup and cloning functionality. You do not need to install the software in this CD, if all you will be doing is accessing the drive as a mass storage device.
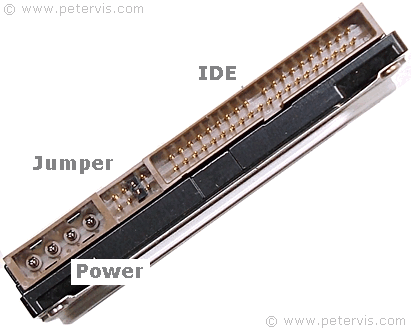
As you can see, the printed circuit board (PCB) has plug connectors for the IDE and power ports, which mate with their respective counterpart connectors on the hard disk. It is therefore a simple matter of aligning the drive and plugging it in. Click on the image above to see exactly where a PC hard disk would connect.
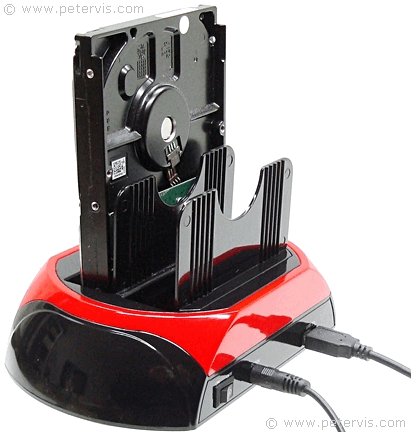
Power Connectors
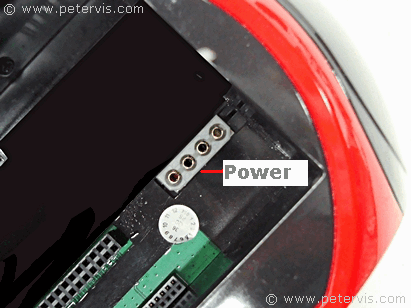

Turn over the hard drive so that the Molex power connectors on the drive and the dock station are on the same side.
Desktop Hard Disk Position
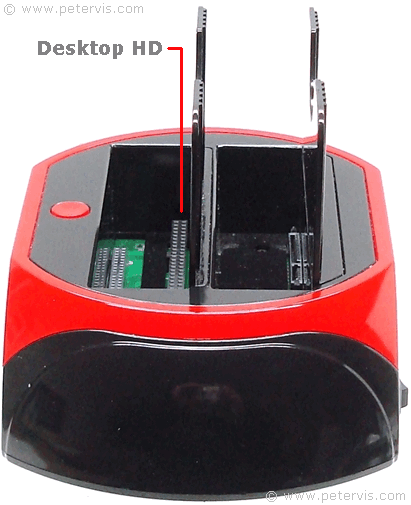
A desktop hard disk such as PATA will connect in the centre.
If the power connectors align and mate properly, then the IDE connector will follow and align as well. The docking station connector usually ignores the pins for the jumper settings and they do not connect to anything.
Maxtor DiamondMax 21
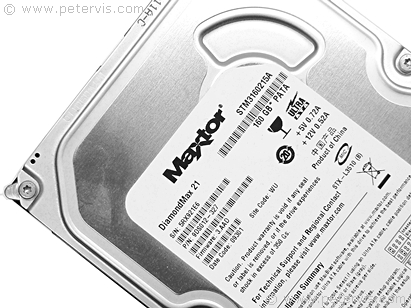
I am using the Maxtor DiamondMax 21 hard drive, which also came from eBay as a refurbished drive. It seems to be operating fine with this docking station.
Installing the Hard Drive
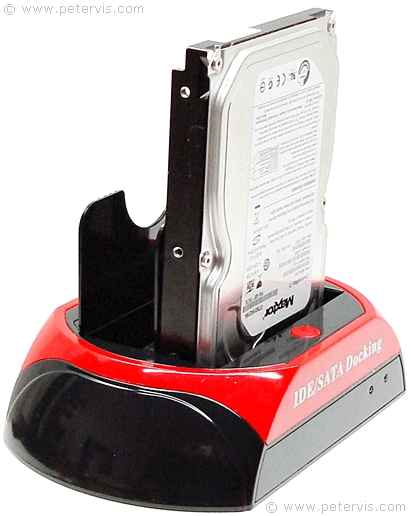
Very gently align the drive to mate with the sockets on the dock station, and then apply a small amount of force so that the connectors join and make an electrical connection.
Connecting the Wires
After seating the drive into the dock station, connect the power supply and USB cables, and switch ON the dock station. When you switch it ON, your computer will automatically detect the device connected to the USB port and install the necessary drivers. In "My Computer", you should see a "Removable Drive" icon.
This Article Continues...
All in One HDD DockingAll in One HDD Docking Drivers
All in One HDD Docking Station How to Use Instructions
All in One HDD Docking IDE Not Working
No Drives Showing
IDE / SATA Docking Box and Packaging
IDE / SATA Docking Station Adapter Power Supply
Inside Look