Connecting the Crystal Radio Coil
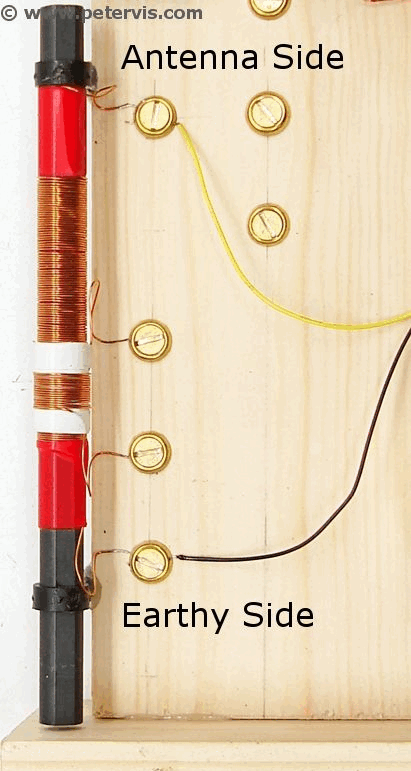
Connecting the Crystal Radio Coil is simple, and as you can see from the diagram above, the coil has only two terminals. One side is the antenna side, which is where one would connect an antenna, and the wire connecting to this terminal is yellow. The other side is the earthy side, because this is where you connect the earth wire, and the wire connecting to this terminal is black.
Ideally, you should keep the terminals to the tuning capacitor as short as possible, and close to the coil terminals. However, in this design my clients wanted the tuning capacitor to be on the right hand side of the radio. Since the distance from the coil to the tuning capacitor is long, a co-axial wire would work even better to reduce crosstalk.
The yellow and black wires connect directly to the variable tuning capacitor. If you are using a recycled tuning capacitor with many pins then follow the link to learn what these pins are for and how to correctly connect them. It will show you the pinout and organisation of this component.
Connecting the Tuning Capacitor
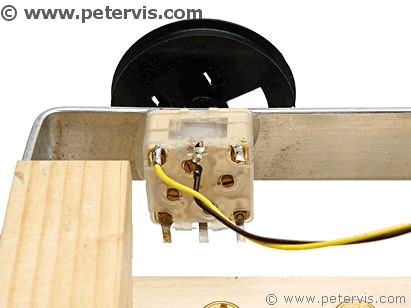
Most tuning capacitors follow the same convention; however, if documentation is available for your component then you should consult that.
If you look very closely at the back of your tuning capacitor, there should be some writing indicating which the top side is and which the lower side is.
Connecting a tuning capacitor to a crystal radio is very easy, because the coil wire on the antenna side, which is yellow, connects to the top left pin on the variable capacitor. The coil wire on the earthy side, which is black, connects to the top centre pin on the variable capacitor.
Earth and Antenna Connection
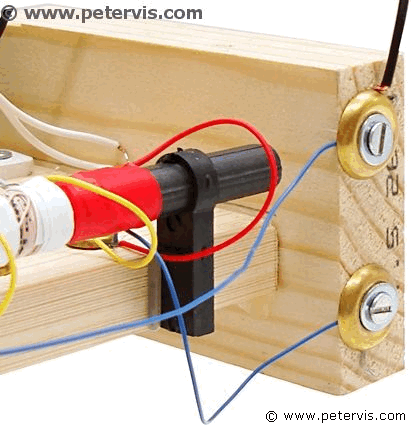
If you have some of those brass screw cups left over, you might want to have separate dedicated terminals for the antenna and earth. I had some large screw cups in my toolbox and decided to use them here.
One aspect to consider is that the antenna and earth wires usually tend to be much thicker than the coil wire, hence if you connect both under the same screw cup, then chances are that the thicker wire will catch the cup first, and the thinner coil will then make a poor contact.
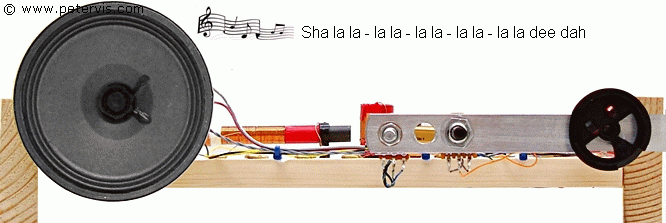
This Article Continues...
Making a Crystal Radio Electronics LabMaking a Crystal Radio - The Little Whippersnapper's Parts List
Crystal Radio Baseboard 4-inch by 12-inch by 1/2-inch
No. 6 Brass Screw Cups & No. 6 Screws 1/2-inch
Marking Out the Baseboard and Installing the Screws
Making the coil
Crystal Radio Coil
Crystal Radio Coil Winding
Crystal Radio Coil Terminals
Connecting the Crystal Radio Coil
Main parts
Crystal Radio Diode
Germanium Diode Test
Crystal Radio Earphone
Crystal Radio Circuit
Crystal Radio Specification
Optional
Potentiometer Mounting Bracket
RFC - Radio Frequency Choke
Project Power Supply Wiring
10k Potentiometer Wiring
BC549C Lead Extensions for Future Amplifier Projects
Wiring the Speaker to the LT700 Transformer
Credits
The Little Whippersnapper's Radio