Crystal Radio Coil
A radio coil is a tuned circuit, which operates within a specific frequency range determined by its physical construction and electrical characteristics. It is the most critical part of a radio. If the radio coil does not operate within the correct band (frequency range) then you will not be able to receive any signals. If your crystal radio coil is not working, then this article will help.
Ferrite Coil and Rods
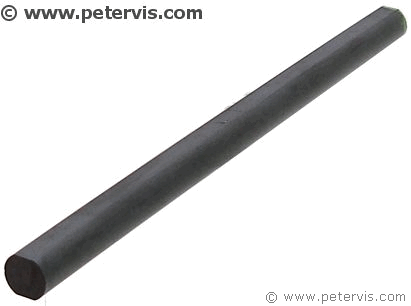
A ferrite coil consists of a coil of wire wound around a ferrite rod. Ferrite rods generally follow the same dimensions, and this one is 16 cm in length and 1 cm in diameter. However, anything smaller up to 10 cm in length will work as well. If it is slightly longer than 16 cm then that is fine as well, and do not bother cutting it. This type of ferrite rod is usually available on eBay, and they are very low cost.
Coil Not Working
I do not like the idea of using just ordinary single core coils, and I have seen many cowboys showing examples where they wound some coil around a pipe and it worked for them. There are many guides where they break open a transformer for the coil; however, single core coil does not work as well as Litz wire, which is the proper coil for use in radio construction.
There are also examples where people are using ordinary insulated wire, and whilst it might receive some stations, it is not very scientific and difficult for anyone else to follow. In addition, these types of coils will have a poor Q value, and consequently the selectivity will be very poor and you will not be able to tune into the stations.
The Correct Diameter
Standard Wire Gauge (SWG) defines the thickness of the copper wire. To make a crystal radio coil, you need 26 SWG, which is 0.4572 mm, or 0.018 inches. You can get this from almost all electronics stores. Although this type of coil works best, it does not perform as well as a proper radio coil.
It is highly recommended that you buy the correct type of coil and not use recycled coil because it is the most critical part of the radio.
A Proper Radio Coil - Litz Wire
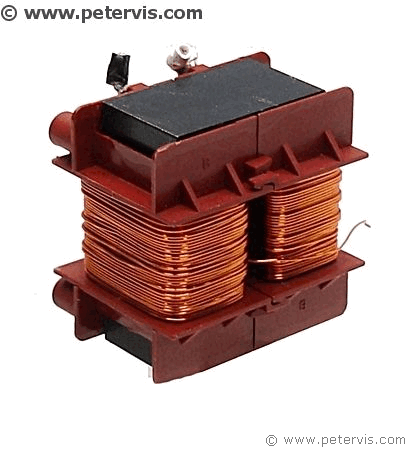
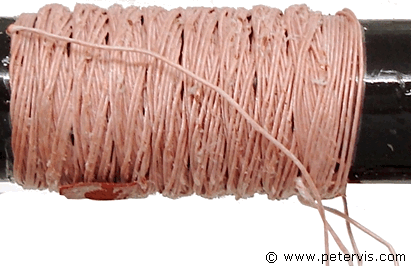
As you can see in the photograph above, the correct radio coil has a fabric type coating. Inside, there is a bundle of micro-thin wires, individually insulated. As you can imagine when you have a coil like this with micro-thin wires, each carrying a small amount of current, it all adds to make a stronger signal.
If you look inside commercial radios, you will see that they all use a special radio coil like this because it is the most sensitive. Their top engineers have carried out hundreds of scientific tests to come to this conclusion; therefore, this is the best coil to use if you want the best results. This type of coil also provides the best selectivity.
Litz wire comes in many different types. For example, the 660/46 wire is a Type II wire which contains 660 strands of individually insulated AWG #46 (0.04 mm) wires. A Litz wire with more strands is obviously going to be more sensitive, and provide a stronger signal, than a wire with just a few strands. These types of wires also tend to out-perform a single core copper wire, which is why all the crystal radio experts use them.
Medium Waveband Coil

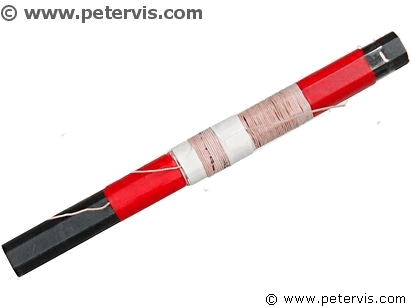
As you can see, you need precisely 45 turns of the coil wound around a 10 mm diameter ferrite rod. A tight and neatly wound coil occupies 14 mm length of the rod. I measured the coil inductance and found its value to be 148.6 µH.
A standard and commonly available variable tuning capacitor of value 365 pF connects in parallel to the coil, and together, they form a tuned circuit for the Medium Waveband (MW) reception.
Here is another view of the MW band coil.
Long Wave Band Coil
Here is an example of a Long Wave band coil.
Here is another view of the coil.
How to make a Crystal Radio Coil
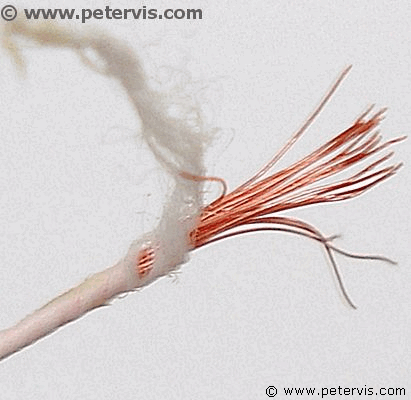
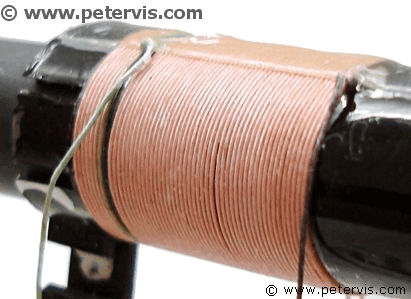
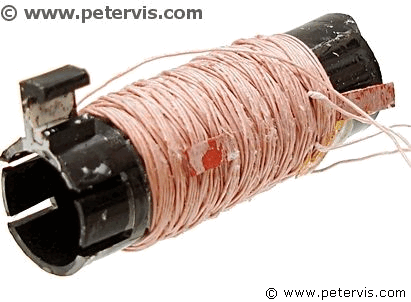
For the whippersnapper's second radio, I decided to use some recycled parts. I happened to have an old choke that was almost like a reel of wire. It had the proper radio coil wire with a fabric coating with bundled micro-fine wires inside.
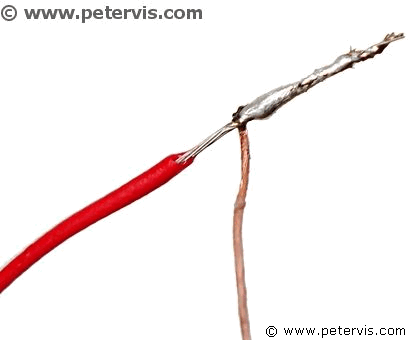
Since each wire in the bundle has insulation, this type of coil requires soldering to another wire, which then makes a better electrical connection with the screw cup system.
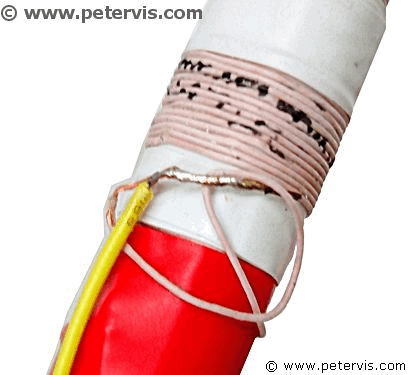
I am using a red coloured insulating tape to secure the soldered part, and a nice tightly wound insulating tape will work fine.
Secret to making a good coil
Coils generally have to be as thin as possible to be effective. Moreover, when you have a bundle of these around a ferrite rod, then you should get greater sensitivity and signal strength. I was able to detect four stations with just a small 2-metre high antenna, and without an earth wire connected. However, with an earth wire connected to the radiator pipe, I was able to get nine stations, and with a longer aerial, it increased to fourteen stations.
If you have a good coil and a good germanium diode, you can hear signals in your crystal earpiece almost straight away without the tuning capacitor, and you should be able to hear all the strong stations simultaneously.
This Article Continues...
Making a Crystal Radio Electronics LabMaking a Crystal Radio - The Little Whippersnapper's Parts List
Crystal Radio Baseboard 4-inch by 12-inch by 1/2-inch
No. 6 Brass Screw Cups & No. 6 Screws 1/2-inch
Marking Out the Baseboard and Installing the Screws
Making the coil
Crystal Radio Coil
Crystal Radio Coil Winding
Crystal Radio Coil Terminals
Connecting the Crystal Radio Coil
Main parts
Crystal Radio Diode
Germanium Diode Test
Crystal Radio Earphone
Crystal Radio Circuit
Crystal Radio Specification
Optional
Potentiometer Mounting Bracket
RFC - Radio Frequency Choke
Project Power Supply Wiring
10k Potentiometer Wiring
BC549C Lead Extensions for Future Amplifier Projects
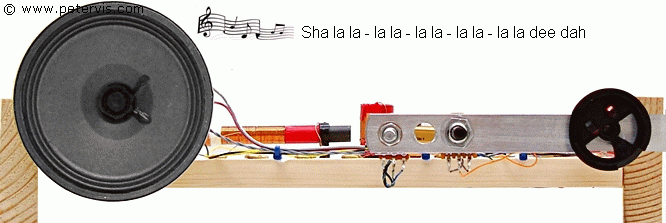
Wiring the Speaker to the LT700 Transformer
Credits
The Little Whippersnapper's Radio